These Mini Pavlovas with Berries are a meringue based dessert that have a crunchy exterior but soft and chewy center. Pavlovas can be enjoyed with different choices of fruit toppings, creams and syrups.
These are the best pavlova recipe I have ever made. I chose to finish off my pavlovas with mixed berry toppings. Spring is coming very soon and the markets have the best-tasting berries. I couldn’t think of a better way to celebrate a new season’s harvest.

What Are Pavlovas?
Pavlovas are a meringue based dessert made with very few ingredients; egg whites, sugar, vanilla, lime juice and cornstarch. What separates a pavlova from a meringue is the added cornstarch that causes the center to be soft and chewy, leaving the exterior hard and crunchy. Pavlovas are also decorated and garnished with fruit toppings, creams, coulis, syrups, etc.
The soft chewy center of a pavlova is achieved by adding cornstarch in it. But if you do not have that or simply would prefer a substitute, you can use cream of tartar instead of cornstarch to get the same result.
How Long Will A Pavlova Keep?
Cooked pavlovas will keep for a day or two at room temperature in an airtight container. When storing your pavlova, the most important thing is to keep it away from heat and moisture otherwise condensation may build up inside and they might get soft and lose their crunch. Keep it somewhere that is cool and dry.
Can You Make A Pavlova The Day Before?
Absolutely! But the better the night before not so early in the day before. They will keep for a day or two so make them as close as possible to when you need to serve them. And pavlovas can be left in the oven overnight. After pavlovas are done baking, they are usually left in the oven for a minimum of 30 minutes to a couple of hours. This should be done to allow the meringue set properly and also cool completely. This will prevent cracks on the meringue. So the pavlova base should be made at least a day before to have a good tasting one.
How Do You Tell If A Pavlova Is Done?
You can tell that a pavlova is done when the exterior has hardened and the color has changed from a bright white to a cream color. Run your fingers lightly on it and do not press into the meringue or you may crack it. However it’s best to keep the oven door shut to not lose heat which may affect the texture. Follow the recipe time and all should be fine.

How To Pipe Mini Pavlovas
Use a piping bag and tip to get a nice shape for your mini pavlovas. Any medium-size design tip of your choice will do. Open stars are the best ones. Gently scoop the wet meringue into the piping bag, secure the top opening and make small swirl circles to create the mini pavlovas.
How To Decorate Mini Pavlovas With Berries
In order to make your berries stick on top of the mini pavlovas, a small dent is made on tope of each one that holds a dollop of whipped cream. Scoop a spoonful of whipped cream on each pavlova, then proceed with decorating them with berries of your choice. I opted for strawberries, blackberries and blueberries. An additional step was taking by dusting powdered sugar on top of the fruits for appeal.

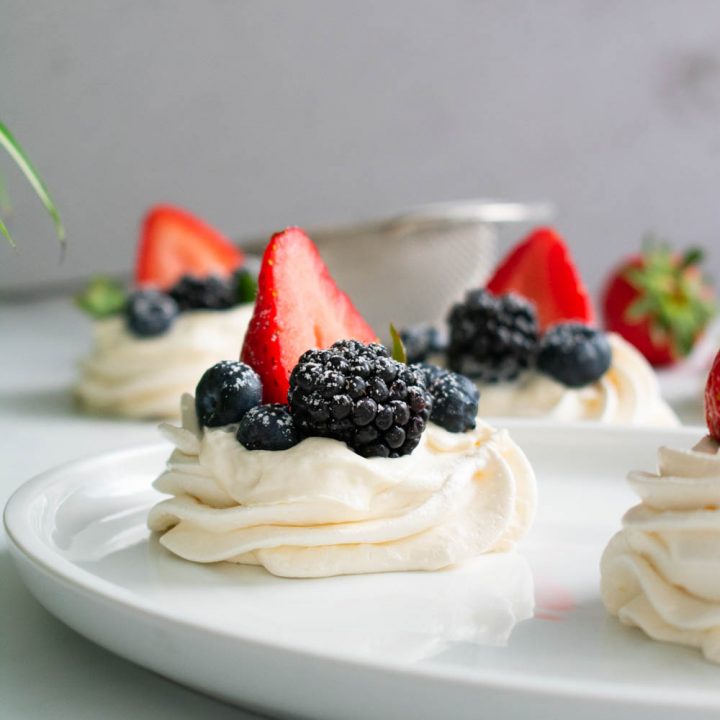
Mini Pavlovas With Berries
Mini Pavlovas With Berries; the meringue has a crunchy exterior with soft marshmallow-like center. Topped with berries resting on a dollop of whipped cream. The berries are lightly dusted with powdered sugar.
Ingredients
- 3 Egg Whites, room temperature
- 1/2 cup White Granulated Sugar
- 2 tsp Lemon Juice
- 1 tsp Cornstarch
- 2 tsp Vanilla Extract
- Whipping Cream
- 1/2 cup Fresh Strawberries
- 1/2 cup Fresh Blueberries
- 1/2 cup Fresh Blackberries
Instructions
- Start by preheating your oven to 250 F / 121 C.
- Line a baking tray with a silicone mat.
- Whisk egg whites in a mixer on high for about 3 minutes until frothy.
- Gradually add in sugar one spoonful at a time.
- Let the mixture whish for an additional 8 minutes.
- Add in cornstarch, vanilla extract, and lemon juice and whisk for 30 seconds.
- Fix a cake decorating tip to a piping bag. Gently put the mixture in the bag and swirl a 3 inch diameter of the pavlova meringue.
- Use a spoon to gently make a shallow well on top of each one. (This space will be uses to hold the cream and berries)
- Bake at 250 degrees for a minimum of 30 - 35 minutes. Turn of the oven and leave in the oven for an additional 30 minutes before bringing out. Let it cool on the baking tray.
- Whisk cold whipping cream and sugar in a mixer on high till it becomes frothy thick with stiff peaks.
- Once the meringues have cooled down, add a dollop of cream and top with berries.
Notes
Make sure to use room temperature eggs to get the best results. They will whip up the best into the meringue.
Make sure your meringue comes to stiff peaks. You’ll know the meringue is ready you pull the beater out and the peaks are glossy, shiny and don’t tip over.
Use a piping bag with a piping tip to make the mini meringues to get a nice shape. If you do not have one, scoop the meringues onto the parchment and a spatula or back of spoon to tidy up the exterior.
Nutrition Information:
Yield: 7 Serving Size: 1Amount Per Serving: Calories: 97Total Fat: 2gSaturated Fat: 1gTrans Fat: 0gUnsaturated Fat: 1gCholesterol: 5mgSodium: 26mgCarbohydrates: 19gFiber: 1gSugar: 17gProtein: 2g
Leave a Reply